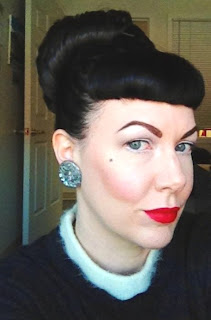
Showing posts with label hairstyling. Show all posts

Wednesday, February 19, 2014

Hair Did Done! (How I do my sets!)

In the four years I have been setting my hair (before it was air-dry or blow dry then flat-ironed), I have tried several methods i.e. foam rollers, ceramic curling iron, pin curls (disaster), flocked velvet steam rollers (eugh), hot sticks, and hot rollers.  After much experimenting, I have come to discover that hot rollers are the best way for me to set my hair and have it last for three days.  My  hair is naturally very fine and my scalp is very oily so despite my best efforts, I simply cannot make my set last longer.  Things just get limp and icky.

Nevertheless, this is how I set my hair:

I wash with Pureology Hydrate Shampoo and condition with Pureology Hydrate Conditioner.

After towel-drying, I use a blend of Surface Bassu Oil Gold and Surface Trinity Protein Cream on my ends and my blond highlight section. Then I apply a quarter-size dollop of Ouidad Moisturizing Curl Gel to my hair. I comb through, section my bangs, apply my Rogaine, and then let things air-dry while I do my makeup.

After the face is done, I roll my bang section in grippy rollers, spray them with Layrite Grooming Spray, and then I finish drying overall with my hair dryer. I concentrate my dryer on my bang section to set the curl. The Layrite Grooming Spray is activated with heat. 

While I am blow-drying my hair to ensure it is totally dry before setting*, I plug in my Remington Tight Curls hot rollers. There are 21 in a set but I wish there were 24. Anyway, once I have achieved completely dry hair, I roll my hair in sections with the hot rollers. I spray a tiny spritz of Layrite on the very ends of my hair and roll up. Finally, I secure the curl with a clip (from a 12 pack from Sally. I bought two). The U clips that came with the rollers were crap. My fine hair would just unroll and the roller itself would fall out onto the floor.

Here I am with my natural hair texture. Can we say 'fuzz ball?!' My bangs are set with the grippy rollers and I am about to set the rest of my hair:


I leave my rollers in for about 30 minutes. While my hair is cooling, I make the bed, do laundry, feed the cat, read CNN online, make lunch for work, and then get dressed.

Then, I unroll my curls, remove the grippy rollers, and I finger style my hair with a touch of Layrite Original Pomade. On my bang section, I use the husband's heavier type of Layrite Pomade (the darker colored jar). I shape my bangs, roll, and pin.  Then I spray curls into their final shape with Aussie Instant Freeze Hairspray.

When I go to bed at night, I simply wrap a chiffon scarf around my set. The next day, I apply a light amount of TiGi Catwalk Dry Session Series Dry Shampoo to fluff curl and give it a refreshed look and feel. I re-pin my front roll and I may use hair combs. On the last day of my set, I will re-apply the dry shampoo spray and put my hair into a ponytail.

I like to set my hair because not only does it give me the vintage style I want, I look like I have more hair! Let me tell you, my hair is so thin and fine. I have had stylists in the past give me a blow-out and then flat-iron (standard for modern salons), and I hate it!!!! Sure, my hair looks silky but it also showcases how little hair I have. I feel so bald! Oh what I would do for more hair.

Anyway, all pouting aside, I love to set my hair because I can make my style last longer, I wash my delicate hair less, my hair is vintage-looking, and I look like I actually have a good head of hair! Curl = volume!

So, what is your "tried and true" hair routine?


*Please, take it from me, never EVER use any type of direct heat from rollers, curling irons, flat irons, etc on damp hair! Even slightly damp hair will be damaged. Doing so causes your hair to be boiled and your cuticle destroyed.

Wednesday, September 4, 2013

Learning to Let Go of My Bettie Bangs

For the last 6+ years, I have had "Bettie bangs."  There was, however, a brief period in 2010 when I tried to grow my bangs out in the hopes of achieving more styling variety.  Alas, my feeble attempts to "stay strong" and resist the charms of Bettie bangs eventually fell victim to my stylist's shears.  Before I could say, "I am trying something new," the Bettie bangs emerged victorious.

Despite my love/hate/love relationship with my bangs, I have decided to grow them out this time, for real.  There will be no wavering!  My mind is made up.   I realize that it's not that I "hate" my Bettie bangs, but I am ready for a change. 

In late July, my stylist, Jesi, cut and shaped my bangs into the beginnings of a side-swept bang.  I want to be able to wear them like this (albeit a little longer):


I also would like the option of rolling my bangs back so I can do styles like this:

As of right now, I can do a reverse roll, although it's small:


In the last 6 weeks that I had my Bettie bangs re-shaped, they are still on the short side.  The side-angle look is becoming more and more evident but I realize I will not have full effect/length until probably the end of the year or later.

In the interim, I have purchased a side-swept bang clip-in from Hairdo on the days I want a side-bang look:
The clip-in is easy to use and is washable.  I shampoo, rinse, and air-dry.  The piece is made with synthetic hair so do not curl with heat or it will melt!

Here is me with the clip-in:


I am excited about the prospect of my bangs growing out!  After 6 years of the "same old, same old," I am looking forward to a new look! 


Thursday, April 25, 2013

For The Love of Vintage Hair -Getting to Know Hair Pieces

In the 14 years I have been experimenting with vintage hairstyles (I did swing in the late 90s), it has only been recently that I began wearing hair pieces. In September 2009, I was diagnosed with genetic hair loss/hair thinning and started using Women's 2% Rogaine. Even though my hair has always been fine, as I approached my 30s, I noticed my hair was losing volume. So, not only was my hair fine, it was now becoming thin! Oh fun!

Despite my knee-jerk reaction to simply give up and cut my hair off, I began researching hair extensions. I found out from my stylist that not only were they super expensive, they required costly maintenance, and in many cases they could make my hair loss worse. I quickly nixed that idea!  Then one day while searching the Internet, I stumbled upon several online wig stores. I found everything from clip-in extensions, 3/4 wigs, headband wigs (a 1/2 wig with a headband attached), and even human hair clip-in extensions and volumizers.  After some decision making, I bought a synthetic clip-on ponytail and headband wig. Let me tell you, those two hair pieces became my precious accessories! I wore them both to death! When the wigs started to show their age, I knew I had to find something better made!

In 2011, I finally made the investment to buy a human hair 14 inch, clip-in volumizer.

http://www.wigs.com/product_info.php?cPath=2&products_id=3344

After I received the hair piece, I made an appointment for my stylist to color and cut it so it would match my color and blend into my own hair. I still have that volumizer and I wear it when I do a long, curled style.

However, lately I have not been wearing my volumizer as often. In the last six months, I have incorporated collagen supplements and a higher mcg Biotin pill into my daily vitamins. I continue to use my Rogaine for Women (the Target brand) faithfully. I am not sure who is the "culprit," but my hair is healthier and thicker!! I can wear my own hair in a fluffy ponytail or pigtail braids and not feel like I am bald!

This is my hair now and I am not wearing any hair piece:
I will never have thick hair but I my hair is definitely packing more volume!

Anyway, even though my hair is thicker, I still have a little trouble covering those mesh bun forms (found at Sally Beauty). I often need to tease my hair and use tons of hairspray to achieve full coverage. I do not like teasing my hair a lot. It can be very damaging, especially for hair like mine. I color it and it's thin. So, I need to find other ways to do vintage buns and up-dos that don't compound my hair's condition.

With that said, let me share with you my new little hair secret! HAIR PIECES!! Yes, hair pieces save the day again! Instead of clip-in volumizers or headbands, we are talking drawstring buns, wiglets, and toppers! I recently purchased three different synthetic hair pieces from a fabulous Etsy seller!

https://www.etsy.com/shop/FancyNancyHairUpdos?page=1

I got the Dusty piece:
I also purchased the Gina:
And lastly, I bought the Audrey:
How do I wear them? I simply put my hair into a ponytail and wrap the ends into a bun and secure with an elastic. I spray my hair with a strong hold hairspray to smooth out my "base" and using the two hair combs attached inside the piece, I slide one comb on top of the bun and the other underneath. No bobby pins are required! The piece is so secure and lightweight so I just put on a hair flower or bow and I am out the door!

Now, most of you may know that hair pieces are nothing new. They have been around for ages. In the 18th century, wigs were a must for any lady wanting to keep with with the latest fashion! Marie Antoinette anyone? In the 1960s, wiglets and full wigs were all the rage!

My mom and mother-in-law were both in their teens and 20s in the 60s. Both of them have told me how wiglets were pretty much standard for daytime looks and evening style. Just look at Christina Hendricks' "Mad Men" character, Joan. She wears tons of hair pieces throughout various seasons. During the season two episode, "The Mountain King," Joan is seen wearing a gorgeous purple dress and what looks like two hairpieces, one being the main up-do and the other a braid wrap/accent.
Even though I HATE the Greg character (especially during this episode), I just can't stop looking at Joan! Her style and hair, particularly during the first two seasons, are just perfection! I want that dress!!

Nevertheless, I am simply over the moon I found such fantastic hair pieces!I love wearing them and I really love the ease in which I can do vintage up-do styling!


Friday, July 1, 2011

My Experiment With Front Curls and Side Rolls

Last night after my shower, I decided to do experiment with my hair set. Normally, I roll my almost-dry/damp hair down from my center part using my Conair Foam Rollers:
In an effort to "change things up a bit" from my usual routine, I wanted to try to do a style similar to Betty Grable (first picture above) and the iconic Lucille Ball:
 To start, I rolled my bettie bangs forward in the smallest curlers in the set (ie the blue). Then, using my rattail comb, I sectioned off a three inch long section of hair behind my bangs (same width as the bangs) and rolled it forward in smaller sections using the yellow curlers. To finish, I rolled the rest of my hair using the green and pink curlers. I wrapped my head in a scarf and went to bed.

This morning, I took all the curlers out and used my ceramic curling iron to smooth out any curler dents. I brushed my hair out slowly and used a light shaping hairspray to help better shape the curls. I brushed the front 'poof' section and sprayed with hair spray.

I rolled a section of hair on both sides of the poof and created two rolls. I secured the rolls with bobby pins. I put in two red daisy hair flowers I made and viola, the style was done.

A side view:
From the front:
I am somewhat pleased with the outcome. I need to further experiment in order to have the style down pat.

What do  you gals think?

Tuesday, January 25, 2011

Awesome Bobby Pin Find at Sally Beauty! Mini Bobby Pins!

Many of us who do vintage hairstyles often know that bobby pins (or kirby grips) are a MUST! Bobby pins are vital for pin curls, securing victory rolls, and rolling back those Bettie bangs (pompadour) on days we want a different look.

For years, I bought standard bobby pins (Goody) at the grocery store or pharmacy. These types are good for most styles but after a while, "run-of-the-mill' pins tend to snag hair or stretch out after several uses. I usually throw stretched pins out and grab a new one but again, it would stretch out and the little rubber tips on the end pop off and snag/pull my hair. In addition, my hair is very fine and standard pins have a tendency to slide out of my hair.  Also, when it comes to doing rolls and pompadours, most bobby pins tend to stick out (especially when I roll back my bangs) due to the lack of volume.

While I was in Sally Beauty yesterday buying a few things, I spotted a section of bobby pins. There were large sizes, standard sizes, and mini sizes, as seen above. I have never used mini pins and the price, $2.49 for a 36-count tin, made me to want to try them.

The MetaGrip Mini Bob Pins' description states that the pins are tighter and snag-free. Well, today I styled my hair in rolls and not only do these mini bobby pins hide nicely, they really grip my hair amazingly well! I feel like a gale force wind couldn't even ruin my 'do!

Here is how the mini pin size compares to a standard pin:
(The vintage picture is actually from a reprint of a vintage ad that I adhered and then varnished onto a mini Altoids tin. I use it to store extra pins and I keep it in my bag in case of a 'hair emergency.')

So, if you are looking for small-sized bobby pins that work wonders on fine and/or shorter hair, the MetaGrip Bob Pins from Sally Beauty are a must have in your hairstyling kit!

Tuesday, September 7, 2010

The Saga of the Botched Middy Plus Continues!-Using a Diffuser

Last week, my stylist of three years was unable to cut my hair due to an injury. Since my cut and color were already way overdue, another stylist in the same salon refreshed my color and cut my hair. The color is amazing but the cut is not really a Middy. It is layered incorrectly and even looks like a mullet on one side.

After experimenting with various blow drying techniques, steam rollers, curling irons, and velco rollers; I decided to give my old diffuser a try. When my naturally wavy hair was very long, I used to diffuse my hair daily using Paul Mitchell Styling Glaze and Sebastian Shaper hairspray.

I simply towel dry hair and apply a quarter-sized amount of the glaze throughout my hair. Then I spray on a little bit of the Sebastian spray and diffuse my hair in sections. When the curls are dry, I use my 5/8" Gold N' Hot curling iron to better shape my hair. I put in two bobby pins, spray with more hairspray to set, and then I am done.

Before my stylist, Corry, can fix my hair, I think I am going to wait at least 5 weeks for my next appointment so my hair can grow out more. Until then, I am going to diffuse and curl my hair. I think this method covers the misshapen layers well.

The following pictures were taken yesterday before going out with the husband:

This is the left side :
The right:
The front:
I am glad I pulled my diffuser out of the storage closet! I was really having a hard time trying to style my hair with a barrel brush. I cannot wait until my poor Middy is fixed!

So, have any of you used a diffuser? What are your methods for getting hair to cooperate?

Tuesday, August 17, 2010

Pin Curl Guide from the 40s!

Pin Curls. They are the backbone of most vintage hairstyles. I have always had trouble with them. However, Brittany over at the amazing Va Voom Vintage Blog did an outstanding, fabulous tutorial showing the proper way to do pin curls! As soon as I go to Sally Beauty supply to get some more pin curl clips, I am going to finally try do pin curls again. When I attempted to do a set about a month ago, my hair was an absolute disaster! Not only was the curl going in all directions, I had these little "hook end" bits at the end of each curl. What I really have difficulty with is knowing what direction to spiral the curls in and how to place them on my head.

So, I was really pleased when I found Brittany's tutorial and then this online photo showing curls for a lovely 40s style! It really illustrates the proper directions that curls should go in! It also shows thickness of each curl and placement on the head.

I am excited now to try pin curling again!