Wednesday, December 22, 2010

Off For the Holiday! See You Girls in 2011!

(The photo above shows me and Dad at my auntie's house on Christmas, 1978.)

Well, gals, this will be my last post of 2010! Today is my last day at work and therefore, I will not have access to a computer since my laptop at home died earlier this year.

Tomorrow, I will spend the day cleaning house, wrapping presents, and getting ready to have my in-laws and parents over for Christmas Day dinner. Then on Sunday, the 26th, the family and I are off to NYC for a couple of days. I am looking forward to it but I am also ready to take it easy on New Year's Eve. The plan is for me and the husband to chill at home with some snacks and party with the cats. I really do not care for going out on New Year's Eve. It is often too crowded and there are too many borrachos on the road! So, the husband and I plan to get snacks, open some champagne, eat the rest of the holiday cookies, and watch Mystery Science Theatre 3000.

I hope all of you have a safe, fun, and joyous holiday weekend! Have a fabulous New Year too! See you all in 2011!

It's Finally Here! Besame's Classic Color Lipstick!

A month ago, I posted about the new, upcoming line of Classic Color lipsticks from Besame Cosmetics. If you did not read my post, you can view it here:

http://bettysvintagemusings.blogspot.com/2010/11/besame-cosmetics-lipstick-update.html

Nevertheless, now that the new Classic Colors ($22.00 USD) are available for order on Besame's website, I knew I had to get my hands on Besame Red! Besame Red is a bright, classic true vintage red that is a neutral. Meaning, it is neither warm (orange-based) nor cool (pink/blue-based).

I was so excited to come home from work yesterday and find my package on my doorstep! I quickly opened it up and I was stunned with the packaging and vintage details!

After I opened the box (seen above), I pulled out a little red velvet bag with a gold drawstring and golden metal tag adored with the Besame logo:
Here is the tube itself:
Here is the Classic Color tube compared with an Enchanting lipstick tube:
For comparison with standard lipsticks, the Classic Colors contain .12 ounces of lipstick and MAC has .10 ounces.

Here is Besame Red opened:
Here is a swatch on the back of my right hand:
The color is bright and the texture is creamy yet not wet! Besame's lipsticks are not matte but they can be made to look matte by blotting. I like the fact these lipsticks are not matte because unlike MAC's Ruby Woo or Russian Red, Besame colors will not dry out lips! Morever, the Besame formula is super long-lasting!

Here is a side-by-side comparison of Besame Red (on the right) and Make Up For Ever's Rouge Artist Intense lipstick in Moulin Rouge/#43 (on the left):

Notice that the Make Up For Ever lipstick is a bit darker in tone. It is also glossier. The Rouge Artist Intense lipsticks are very pigmented but they are also very creamy. Even though the Besame colors are super pigmented, their 'less wet' formula makes them more ideal since the color will not slide off/smear as easily. I used to think the Rouge Artist Intense lipstick (especially #42, #43, and #45) was the best but I have to say that Besame lipstick far surpasses Make Up For Ever in terms of color intensity, formula, and longevity!

Here is me today wearing Besame Red:
I really love this shade! I put it on at 10:00 am and it is now 1:00 pm and the color still looks perfect! I can see myself buying more colors (Red Hot Red, Red Velvet, Cherry Red, and Carmine) for sure! I also want to check out Besame's Masterliner Lip Pencil (dual-ended) in Red & Cerise!

So, if you gals are in the market for vintage-true lipstick cased in pretty, vintage-looking packaging, then you have to give Besame Classic Color lipstick a try!

http://www.besamecosmetics.com/products.cfm/Classic-Color-Lipstick/pID-15

Tuesday, December 21, 2010

Holiday Eye Look Using MAC Glitter!

First and foremost, I want to apologize for being off-radar! I have been busy trying to finish buying gifts for family and friends and work has been crazy too. I am also hosting Christmas Day dinner and the next day (the 26th), the family and I are taking the Amtrak to New York City. We are going to spend a couple of days there. Let me tell you, I love the holidays but this season has been especially hectic. Therefore, this New Year's Eve, the man and I are staying home and partying with the cats.

Anyway, I thought I would share my holiday makeup with you girls. Last Friday night, my office held its annual holiday party and this was the look I did. I did my hair in rolls and put the rest in a black snood.

I added a poinsettia flower barrette since it was a holiday party.

I wore a 1950s black velvet dress (which was almost a disaster) for the occasion but in these pictures I am still in my work/day outfit.

Here is an upclose look at my eyes:
And another view:

I started by applying Nars' Smudgeproof Eyeshadow Primer from lashline to browbone. I then applied MAC's Paint Pot in Pharaoh to the lids. I put on MAC's Sweet and Punchy eyeshadow on top. On my crease, I applied MAC's matte shadow in Copperplate and then I put on MAC Vanilla shadow on my browbone.

Then, I combined a tiny dot of MAC Pro's eyeliner mixing gel with a small amount of MAC Pro Glitter in Chartreuse. Using a small flat brush, I applied a thin coat of the glitter mixture and used a hair dryer to dry and set the gel. To complete the look, I applied MAC's liquid liner in Point Black for a cat-eye liner effect and on my lower lash line, I applied Make Up For Ever's Aqua Eyes liner in 9L (a soft pale shimmery gold shade).

I think the look came out well but working with glitter can be annoying since it likes to scatter! The gel is a must-have when wearing glitter on the eyes. It keeps it safely in place and without it, you risk eye irritation and major fall-out! There is nothing worse than having glitter on your face instead of your eyelids! If glitter "escapes" and ends up on your cheeks, simply use a make-up wipe or a powder brush coated with loose powder.

So, are you girls going to any holiday-themed events/parties? If so, do you do any special makeup looks? Please share!

Monday, December 13, 2010

It's An Atomic Christmas!

It's Holiday time! I love this time of year because of family getting together, the cold weather, food, parties, making cookies, and decorating!

In the past year, I have been transforming my house into an atomic, 50s abode. I have been having fun slowly collecting vintage housewares and textiles. So, when I pulled out my holiday decorations from my storage area in the basement, I realized I also needed to vintage-ize my Christmas wares! I started with the tree, as seen above.

Now, most of the decorations on my tree are very traditional. Meaning, they have that retro look already. My decorations include jewel-colored glass balls and painted glass in shapes of houses, mushrooms, and nutcrackers. I have found a few retro-inspired decorations at Michaels Crafts over the years since the husband and I got our first tree in 1996. 

A couple of weeks ago, I found this lovely, 50s-esque tree star at Michaels for under 15.00 USD!:
I love it! I reminds of the decorations from my parents' first tree in the mid-60s! 

I also bought a few vintage decorations on Esty for real cheap! I got three red plastic starbursts and a set of four ornaments that are made with clear plastic and have plastic flowers inside!:
Here is another one:
This is one the red starbursts! I love the way they capture the light:
Here is a 50s vintage red plastic and silver tinsel light decoration! I have a set of about 8 that were given to me by my mother-in-law. They used on her childhood tree! The set includes colors in blue, pink, yellow, and green!
The silver tinsel on my tree has the thinner look and feel of vintage tree garland/tinsel. Most modern tinsel/garland is very full, thick, and bushy. I bought two packages of silver garland at my local dollar store for a buck each! Can't beat that!

The above photo shows the holiday table runner my mother-in-law gave me about five years ago. It is paired with my vintage pink and gold starburst tray that sits on my living room coffee table!

And even though the DC area only got a mere dusting of snow last night, I really felt the holiday spirit when I looked out my back patio window this morning!  Even though I am disappointed at the amount and the fact it was melted before noon, I still enjoyed the look of the snow. I think "white Christmases" are magical! I hope the DC area gets snow for the holidays!

 So, will your area get a white Christmas? And more importantly, how do you decorate for the holidays? 


Thursday, December 9, 2010

Baby, It's Cold Outside! -My New Found Love of Berets!

This me after getting home from work last night! It was really cold! I am wearing a black angora beret I bought at Urban Outfitters for 10.00 USD about 10 years ago. I have barely worn this hat until recently. I really like the way it looks on and it pairs nicely with a lot of my 40s and 50s clothing styles.

It has been in the low-mid 30s here in the DC Metro Region for a few days and apparently, my weather "boyfriend" Doug Hill of local ABC affiliate WJLA said that the region is in for more cold temperatures. There is even a slight chance for snow on Sunday into Monday. If the area does get snow, I suspect it will not be much. But any amount, big or small, is good to me!

Since it has been so bone-chilling cold, I have invested two more berets that I bought on Etsy.

One is made with red wool:

And here is a black, hand-knit "bubble" beret:
I have not received the red beret yet but I got the black one last week. I love it!  I especially like the little 'bubbles' all over it! Too cute! The yarn is super soft and keeps my head very warm!

I like berets not only for their look and warmth but also for their ease of wear! I can be lazy with my hair! I simply style and flat iron my Bettie bangs, put on my beret, secure it with a few bobby pins, and I am out the door.

So, do you gals wear winter headwear? What are your faves?

Tuesday, December 7, 2010

Honoring Those Lost-69th Anniversary of The Attack on Pearl Harbor

Today, the 7th of December, 2010, marks the 69th anniversary of the attack on Pearl Harbor on the island of Oahu, Hawaii. The first wave of Japanese bombers hit Battleship Row at 7:51 a.m. and the second struck at 8:30 a.m. Nine Navy ships were sunk and 21 were heavily damaged. In addition, 188 military aircraft were destroyed when nearby airfields were also attacked. Over 2400 lost their lives.

The photo above shows the moment when an overhead bomb struck the forward magazine of the USS Arizona. The Arizona lost nearly 1200 sailors.

This is how the Arizona looks today:

It is sad knowing that all those men aboard the Arizona are still entombed in the ship. Oil still leaks out from the wreckage, like a constant reminder echoing her great loss.

The Arizona Memorial was dedicated in 1962 and has about one million visitors each year. The white, open-air design gracefully and delicately stands above the remains of the ship. On the walls are the names of the men who went down with the Arizona.

Unknown to many, there is another memorial in Pearl Harbor. The USS Utah:
 
The Utah was capsized during the December 7th attack. 58 sailors, including 6 officers, were killed.  After the attack, the Navy attempted to right the ship but the effort failed. The ship rests on her side on the edge of the harbor:


Until the tragedy of Pearl Harbor, the United States stayed out of the war  that began on September 1, 1939 when German forces invaded Poland. The day after the attack, December 8th, President Franklin Roosevelt gave his heart-felt "Infamy speech" and declared war on the Empire of Japan.

From 1942 to the bombings of the Japanese cities of Hiroshima and Nagasaki, American Naval and Marine forces fought fiercely against Japan. American forces also joined the Allied in Europe in an effort to stomp out the evil, Nazi Regime. Many, many lost their lives yet their sacrifice will never been forgotten.

So, on this sacred day, let's take a moment to remember those lost on this day, 69 years ago.

Monday, December 6, 2010

Longer Lasting Nail Color! Introducing CND's Shellac!

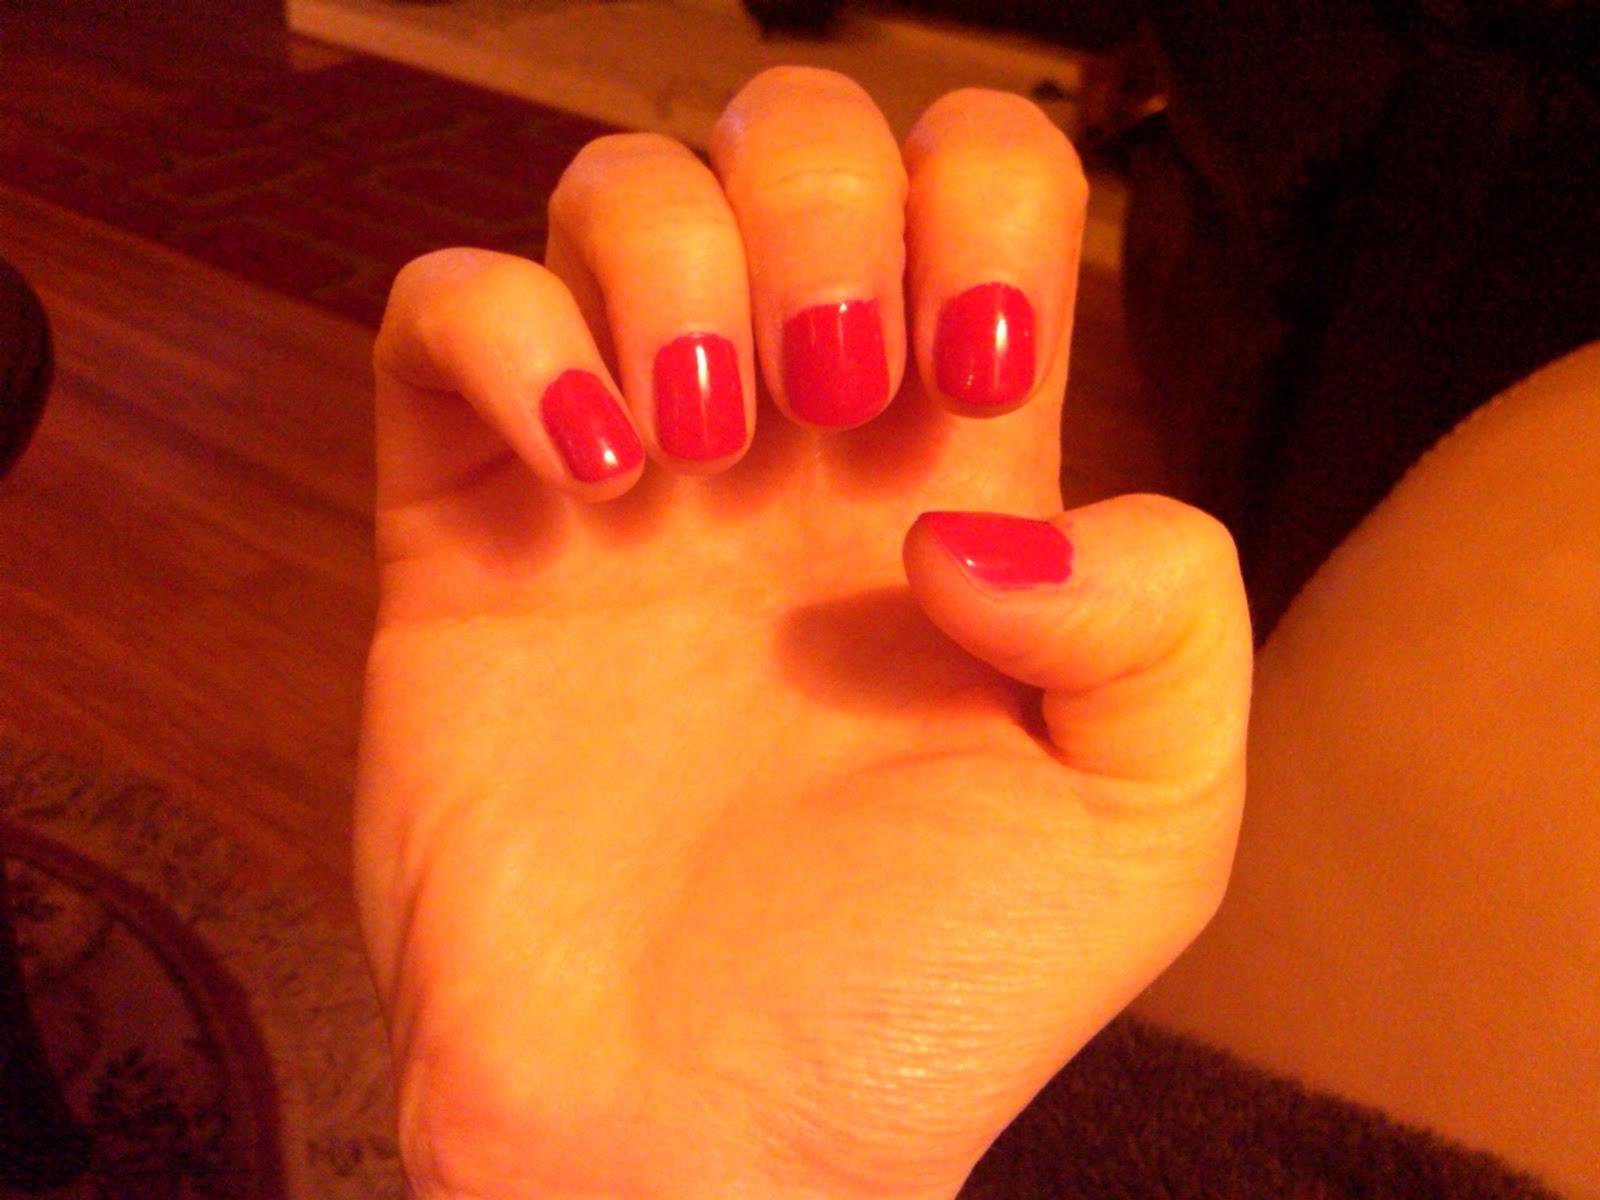
Hey, gals! You are looking at nails that were painted 5 days ago! Notice that there are no chips, dings, smudges, or flaking! This past weekend, I cleaned house, did laundry, took out my holiday decorations from the basement, decorated the house, assembled and decorated my Christmas tree, and cleaned scores of dishes. Even after all the chores were done, my nail polish survived totally intact! If I was wearing 'normal polish' like OPI, Essie, or China Glaze, my nails would be wrecked. So, how did I manage to get such iron-clad color? CND Shellac, of course!

What is Shellac? CND, or Creative Nail Design, has created a gel nail color system that is applied on natural nails.  Shellac made its debut earlier this year. The system contains a gel base coat, gel polish, and gel topcoat. The three polishes are applied separately and a special UV light is used to cure each layer. Unlike most gel formulas, Shellac is applied directly onto the natural nail with no buffing or sanding. Thus, the natural nail is not damaged in any way. The finish result lasts about two weeks and when it's time to remove, the polish is soaked off and re-applied.

I first found out about Shellac when I was in South Florida for Thanksgiving. I went to a local salon to get my nails done with my mother-in-law and her cousins. I saw promotions for Shellac and when I got home, I googled it and  was instantly intrigued. 

I love having my nails painted in vintage reds.  My favorite color is bright red cream with a blue base.  Whenever my nails are bare, I feel incomplete. I enjoy doing my nail polish myself but the color chips in about a day! I wear gloves when doing the dishes and I try to refrain from using my nails when opening things. Despite my efforts to make my manicure last, I still end up with flaking and peeling polish!  After reading how Shellac works on the CND site, I felt like my polish dreams came true! I searched on the site for a local salon my area and to my surprise, I found one near my office.

I walked into the salon and I was able to get an appointment right away. I sat down in the chair and the manicurist soaked my hands in warm soapy water. After a while, my softened cuticles were pushed back and trimmed. My nails were then shaped and filed. I was told to wash my hands and when I returned to my chair, the manicurist used an acetone-soaked cotton ball to prepare my nail surface for the base coat.

The clear base coat was applied to my right hand which was then inserted into a small, open UV box-shaped light with a timer set for 10 seconds. My left hand's nails were coated in the base coat then inserted into the light for another 10 seconds. The bright, true red gel polish, "Wild Fired," was applied in two separate layers that required a two-minute curing time in the UV light. ( For a total of 8 minutes for color).

To finish, a clear topcoat was applied to each hand and cured for two separate minutes (for a total of 4 minutes). After my nails were done, they were dry! I was floored! No more gingerly reaching into my coat pocket for keys or driving with my pinkies out while I wait for my nails to dry! After my nails were 'shellac-acked,' the manicurist gave me a lovely hand massage with an intense moisturizer. I felt so great and my nails looked amazing.

So, if you love polished nails but hate the up-keep from standard lacquer, you have to check out Shellac! Here is the CND site for more information:

http://www.cnd.com/Products/Color/shellac-hello.aspx

Thursday, December 2, 2010

Thanksgiving in Boca! Part (Final) III (Lots of Pics)

This is the last post regarding my Thanksgiving trip to Boca! I promise! In the last couple days of our visit, the man and I simply enjoyed the warm temperatures and relaxing atmosphere. On our last full day, the family and I went to the pool at my in-laws' condo. The above photo shows some pretty blue flowers that lined the pool fence.

This is me and my fat thighs lounging pool side. I guess all that good eating is evident for sure now! The pool water was actually heated. The condo apparently keeps the water heated in the fall and winter months. Even though it was sunny and 83 degrees, the 88 degree water (there was a thermometer in the pool) felt so refreshing. There was bit of a breeze coming off the nearby ocean so the heated water was really a plus.
Here is the man taking a dip.
Me enjoying the sun after a swim. Again, thank goodness for high SPF sunblock!
This gecko was on one of the legs of my sun lounger. Geckos are everywhere in South Florida! I think they are cute. I asked him if he could save me money on my car insurance but he didn't say anything back. (I know, bad joke!)
The next day, it was time to leave. This is one last look outside my mother-in-law's patio.
Here I am trying to take it all in one last time before going back to cold and rainy D.C.
The man and I then got our luggage, packed up the car, and drove to the airport.
Here we are, Fort Lauderdale International Airport. Bye, bye, South Florida! I know me and the man will be back again soon!

Thanksgiving in Boca! Part II (Lots of Pics)

Yesterday, I posted a little bit about my recent Thanksgiving trip to Boca Raton, Florida along with several photos! Well, today I am posting a continuance of my previous post. I also noticed that I lost a follower. I hope I wasn't too boring!

Anyway, after the family and I celebrated Thanksgiving Day with a great meal, we visited the beach the next day! When we first arrived with our cooler and chairs, the sky looked very cloudy and it seemed like our day out was going to be a wash-out. Nevertheless, the sun came out and we had an awesome, relaxing day.

The temperature was around 81-82 degrees. The ocean was chilly but the man and I braved the cool water anyway.
Here is a view showing a couple of condos. The building on the far left is actually a house. It was huuuge! The man's cousin who lived a few blocks away told us that the house is the residence of a local doctor. Oh, what a dream it would be to live on the beach!
Here is our little spot on the beach. It looks cloudy but like I said, it cleared up. Left to right: the father-in-law, mother-in-law, and the man.

Here I am, 'trying' to look chic in my Esther Williams one piece sheath bathing suit. The condos in the background are apparently one million a pop. If you look carefully, you can see that a lot of condos' shutters are pulled down. Many of the residents live there only part-time.
Finally! The sun came out and the clouds went away! Look at that water! Love it!
It felt so nice to get my toes in the warm sand!
Basking in the afternoon sun. Thank goodness for SFP 30!
After our beach visit, me and the family went over to Deerfield Beach's boardwalk and dined at the Patio Bar. I had a crab cake sandwich with fries and a big 'ol margarita! The food was delish and the drink was a perfect way to end an afternoon playing in the sun and sand.
At the end of our meal at the Patio Bar, the family and I went back to the cousin's house and relaxed. I ventured out into the garden again to enjoy the flowers and take pictures. Here is my favorite flower again, the hibiscus! The red hisbiscus is my absolute favorite color/variety!
Another view of the red hibiscus!

Yawner the cat joined me in the garden.
Here I am, checking out the pink hibiscus bush. I am still in my bathing suit from the beach. I was waiting for my turn to shower off.

We spent the rest of the day at the cousin's house. We relaxed, played board games, and had Thanksgiving leftovers on the patio for dinner.

The next few days were spent hanging with family and enjoying the weather.

More pictures to come in Part III!