Showing posts with label makeup. Show all posts

Tuesday, November 12, 2013

Two New Products from Besame Cosmetics!


Ever since I discovered Besame Cosmetics four years ago, I have been totally hooked on their gorgeous, vintage packaging and amazing product line!  Whether it's their intensely-pigmented lipsticks or their smashing foundation, Besame nailed it when it comes to combining vintage aesthetic with product quality and performance!

http://www.besamecosmetics.com/home.cfm

Besame Cosmetics is based in Glendale, California and is lead by the amazing Gabriela Herandez and her husband, Fergus.  I have had the pleasure of speaking with them both over the phone (questions regarding orders or products) and not only are they very nice, their adoration and dedication to their work is incredible.  Simply put, when it comes to customer service and quality, I cannot recommend Besame Cosmetics enough!

Less than two weeks ago, I received my most recent order from Besame.  I purchased the brand new lipstick shade in "American Beauty" and the re-formulated, re-released Besame Souffle Foundation in the shade "Bisque."

Let's start with the lipstick!  According to the Besame website, the Classic Color Lipstick in "American Beauty" (.12 ounces, $22 USD) is a faithful reproduction of a popular lipstick shade from 1945.  And let me tell you, this lipstick is indeed a 'beauty' of a shade!  It is a vibrant cranberry-red with a pink-blue undertone.  The color itself falls between the bright "Besame Red" and the lush, darker cherry-toned red, "Cherry Red."  Imagine if "Besame Red" and "Cherry Red" had a baby.  The result would be "American Beauty." 

In addition, for those of you familiar with Make Up For Ever's Rouge Artist Intense Lipstick in #45 (available at Sephora and Sephora.com for $19 USD), that color and the "American Beauty" are very similar, if not the same shade.  For further reference, MAC's lip pencil in "Cherry" is a perfect match!

And as for all of my other Besame shades, "American Beauty" boasts a strong color payoff with a semi-matte finish that clings to the lips without drying, bleeding, or feathering!

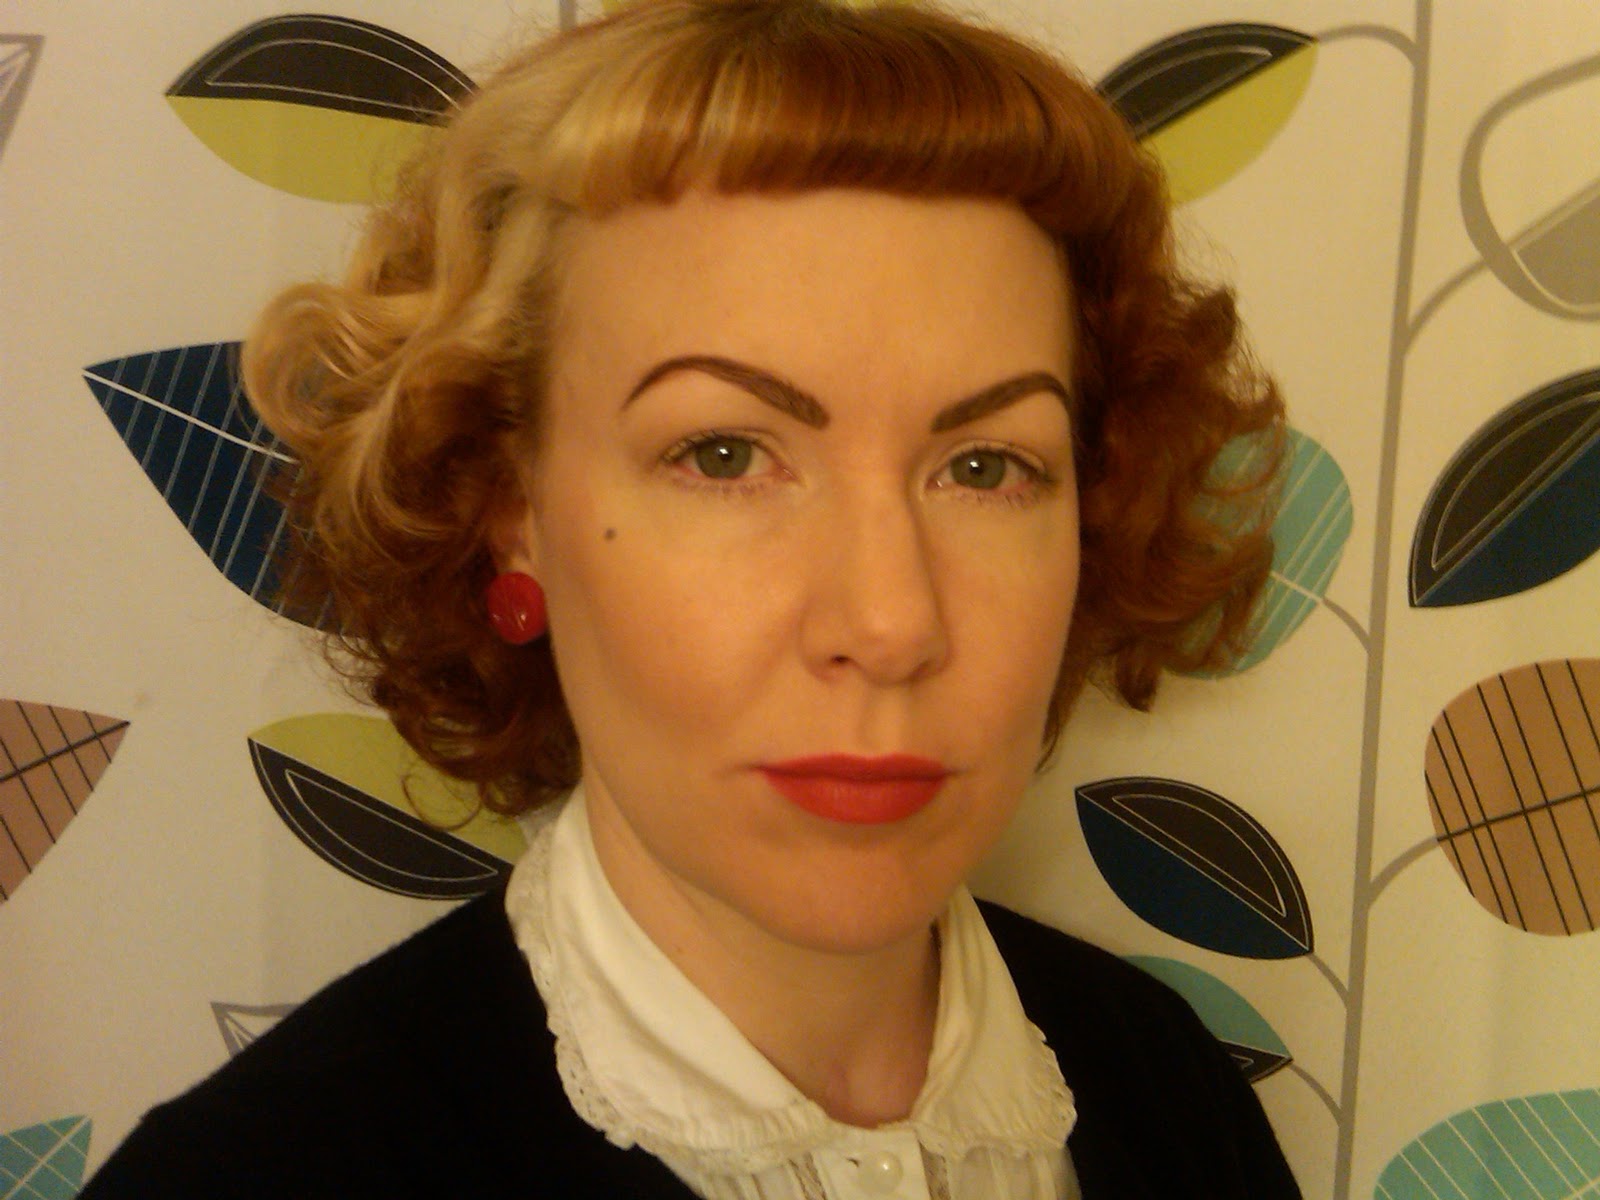
Here is me wearing the lipstick:
As I stated, I also bought the re-issued Besame Souffle Foundation (.56 ounces for $38.00) in shade "Bisque."  "Bisque" is the lightest shade in the range (there are 5 shades total).  For reference, I am a MAC NW15, a Giorgio Armani 02, a Bobbi Brown Porcelain, and in most brands I am considered an "Ivory." I have oily and sensitive skin that is neutral yet leans pink.  This "Bisque" shade is absolutely perfect for my skintone!

Besame had a previous version of this foundation that had a creamy, whipped consistency.  It came is a jar container that was discontinued and then re-released in a squeeze tube.  The tube version of the foundation was phased out and is now back it its original jar form.  This new foundation is a firm, concealer-like texture that is very smooth and pigmented.  A little product goes a long way!  I use a wedge sponge for application and the foundation goes on like a dream.

Further, this foundation is not only different in texture, it features a new, skincare ingredient called "Collageneer."

Besame describes Collageener on its website as follows:

"Collageneer®, a patented active ingredient derived from Lupin seed coatings, has the ability not only to increase the synthesis of type I collagen (the most abundant collagen, which diminishes with age), but also to promote production of a high quality collagen that gives the skin its firmness and elasticity.

This extraordinary foundation provides outstanding coverage with a light and silky smooth texture for a flawless face. Can be used for full coverage as foundation or concealer.

Available in 5 shades, packaged in vintage style cream glass jars. Fragrance-Free, Paraben-Free."


Here is me wearing both the lipstick and foundation:

 I have been wearing the Souffle Foundation daily since I received it and it has not caused any breakouts or irritations!  I use a blot sheets to maintain my look throughout the day and I have not experienced any caking or oxidation (turns orange).  I simply love this stuff!

In addition, today I tried a new method of foundation application I saw on RuPaul's Drag Race last night.  (They are replaying Season 1 on Logo on Monday nights).  Nevertheless, I noticed one of the drag queens using a hair dryer on her potted, full-coverage foundation to sheer it out.  This morning, used my hair dryer on my foundation for 10-15 seconds.  I let the surface get a little shiny and I stopped.  I then applied with a sponge and wow! The result was just smooth, smooth, SMOOTH!!  My skin looks even better!

So, if you are looking for a pretty berry red and/or a new foundation, you have to give Besame's "American Beauty" lipstick and re-released Besame Souffle Foundation a try! 

Monday, June 24, 2013

Lipstick Review: Lipstick Queen Lipsticks in Red Sinner and Scarlet Sinner

Yesterday, I met my sister and niece for a day of shopping at Tyson's Corner Center, located in Tyson's Corner, Virginia. Tyson's is part of the Northern Virginia/DC Metro area.

During our fun day out, I went to MAC Cosmetics for a few basics and we browsed the stores and had a lovely lunch at La Sandia (a new, upscale take on classic Tex-Mex cuisine). We ordered table-side guacamole and dined on enchiladas, black beans, and tortilla soup.

After lunch, we made our way to the makeup counters in Bloomingdale's. I saw a few things that peaked my interest but I decided I didn't need anything. As we were leaving, I spotted something that caught my eye and lo and behold, there it was! Lipstick Queen!!!!

I have wanted to try Lipstick Queen lipsticks for a long time but no store carried them in the DC area. I have read countless online reviews that detail the quality, pigment, and color. One review said Lipstick Queen "Sinner" lipsticks are "not for the faint of heart" or the "shy." Well, you got my attention!

Nevertheless, you can imagine my joy and excitement when I saw the pretty colors just packed with pigment. According to the sales associate and Lipstick Queen packaging, these lipsticks boast 90% pigment and after trying on "Red Sinner," they were not foolin' around! These lipsticks mean business!

After swatching a few colors, I decided to buy "Red Sinner" and "Scarlet Red Sinner." (Lipsticks retail for 20.00 USD each).
Red Sinner is on the left and Scarlet Red Sinner is on the right. Red Sinner is a neutral bright red that leans slightly cool. The color is similar to Besame Cosmetics, "Besame Red" lipstick. The lipstick goes on opaque with one swipe. The texture is very smooth and rich. These are touted as matte but they have a little creaminess and feel very soft. Moreover, despite the matte description, they are not drying at all. Not one iota.

Here is me wearing Red Sinner:
The other color I purchased, Scarlet Red Sinner, is a berry red. It has a little bit of a claret undertone. The shade reminds me of a lighter, brighter version of Besame lipstick in "Cherry." MAC lip pencil in "Beet" pairs well. Beet is a touch darker than Scarlet Red Sinner.

Me wearing Scarlet Red Sinner:
Another thing I want to mention is how Lipstick Queen classifies their lipsticks. The full pigmented version is called "Sinner" and the more sheer, less pigmented formula is called "Saint." Many of the shades have a light and full-bodied version of each other.

So, how do these lipsticks compare with Julie Hewett? Besame? MAC? I think these lipsticks have more pigment than both Besame and Julie Hewett but only slightly more. The texture is heavier than Julie Hewett and Besame and as a result, the lipstick lasts much longer throughout the day and survives eating and drinking better.

However, when I compare Lipstick Queen to MAC, Lipstick Queen wins out hands down. I am usually a MAC girl but in the last few years, small companies like Julie Hewett, Besame, and Lipstick Queen are out-pacing MAC in spades. For example, I recently purchased RiRi Woo (a retro matte) from the "Rihanna loves MAC" Collection and as much as I love the color, the formula is so dry. It literally tugs at my lips when I apply it. In addition, the texture dries my lips out. I find that I can only wear MAC's Retro Matte lipsticks (ie Ruby Woo and RiRi Woo) for a few hours at a time (ie date night).

Overall, I am pleased as punch with my two Lipstick Queen purchases! If I didn't already have a huge cache of lipsticks on my vanity, I would go out right now and buy more shades. I cannot rave enough about them!


Monday, April 8, 2013

Brows!

When it comes to makeup, my brows and lips are very important. If I had to choose between eyebrows or lips, I would say brows are more relevant. In the 20+ years I have been wearing makeup daily, I have learned a great deal regarding what looks great on me and what I should avoid.

In the late 80s/early 90s, I started to wear brow products to help give my brows shape and pigment. My natural hair color is a Level 7 sandy taupe shade that leans neutral. When I was younger, my hair was a light strawberry blonde copper. I had no eyebrow color to speak of! In salon speak, my natural brows are a Level 10, white blond. Here is a picture of me in 1988. I am in 8th grade and I am 13:


In 11th grade, I found Maybelline's brow/eye pencil duo in Auburn (I think that was the shade name). Not only was the color way too orange, I applied the pencil with such a heavy hand even Joan Crawford herself would say, "whoa there, girl!"

As the years went on, I discovered brow tinting and waxing and I have never looked back. I get my brows done at my local salon every 5 weeks. I also use various products to maintain and enhance their hue and shape.

In the last few years, I come to love brow gels like Make Up For Ever Aqua Brow and MAC Fluidline Brow Gel Creme in "Deep Dark Brunette." I also use brow markers like MAC Penultimate Brow Marker and pencils, MAC Brow Crayon in "Spiked." To keep my brows' shape during the day, I "seal" them with MAC Pro Mixing Medium in Lash (yes, I know it's a base for making colored mascara but it makes a heck of a good brow set when used with a MAC 204 brush).

However, while I was at Viva this year, I visited the Pin Up Girl Booth and have a lovely chat with Micheline Pitt and I bought a bottle of an eyebrow sealing liquid called "Model in a Bottle." Let me tell you, this stuff is fabulous! I wore it over my brows and the color and shape lasted all day and night (even during the late night record hops!)


In conjunction with brow products, brow brushes are a must. I love the MAC 208, Smashbox Brow brush, and Illamasqua Brow brush. You can find the Illamasqua and Smashbox at Sephora. 

When it comes to brow shape, you have to go by the shape of your eyes and the measurements based on your nose. Holly from Temperamental Broad did an AMAZING post on her blog and believe me, she knows her stuff and just look at her! Stunning!!

Here's the post:
http://temperamentalbroad.blogspot.com/2013/01/the-perfect-vintage-eyebrow.html

Micheline Pitt also did a fantastic post on brows too. I adore her and she is not only gorgeous, she is an extremely talented makeup artist who is also very down-to-earth and so so nice!

Here is her post:
 http://www.pinupgirlstyle.com/profiles/blogs/the-perfect-pinup-eyebrows-with-micheline-pitt

So, when it comes to brows, remember to go by the measurement/distance of your eyes and nose. Also, for color: light-hair girls can go one to two shades darker and dark-haired girls (like me) need to stick to one to two shades lighter. Even though I have black hair with a cool blue toner, I use a dark cool brown with a touch of black. I once did black brows and it's too harsh. 

Wednesday, February 15, 2012

A Journey of Understanding My Makeup!

This is me in 1992. It was late August, a week before my senior year began. I was 17 and when it came to makeup, I had no clue! My brows were penciled in using a Maybelline pencil that was too orange-red for my skin and hair color, (and my technique was too heavy-handed), I did not wear the proper foundation shade,  my eyes were too-heavily lined, and if you look closely, you can see I have a "beauty mark" above my lip. It's true; I used my mom's Cover Girl brown eyeliner everyday to create that mark.  I was inspired by Cindy Crawford and yes, Madonna.

As a little girl, I would watch my older sister put on her blue eyeshadow quad by Aziza that she bought at the local drugstore. I was amazed with her mascara technique and with the frosty nude lipstick she wore. I so wanted to be like my older sister! Tan, blonde, and with makeup to die for. 

When my mother and father allowed me to start wearing makeup in 8th grade (albeit very minimal), I was so excited and yet so overwhelmed. I had no idea what colors to wear or how to apply them. I would read the beauty tips in "Teen"Magazine that would read like:

"Wear a brown mascara only on top lashes to open eyes."
"If lashes are darker in color, use a clear mascara for creating shape."
"Wear light concealer and an oil-absorbing pressed powder."
"Adorn the apples of cheeks with a blush color that mimics your natural blush."

For one, what the heck are the apples of my cheeks?! I have apples on my face?! Where!? Secondly, how would I know which shades of powder  and/or concealer would be appropriate? I only had the local drugstore and grocery store makeup brands at my disposal so opening the packaging to swatch colors was impossible. Even if I could "try before I buy," how could my 13/14 year-old self know what looked right? I mean, if I thought blue frost eyeshadow was hot, I would surely be hopeless in other areas!

As I got older, I learned what worked and what didn't work for me through trial and error.  After much practice, I started to do better eye looks, better blending techniques, apply false eyelashes, and do face contouring. When I was able to spend money on brands like MAC, Urban Decay, Giorgio Armani, Chanel, and Make Up For Ever, I invested in good quality lipsticks,  shadows, liners, foundations, and brushes. Let me tell you, a set of high calibre brushes is critical when it comes to better makeup application! 

So, here I am at almost 37 and I am still learning new makeup techniques and tricks! And I hope I never stop learning! For example, just two weeks ago I learned how to properly contour my nose! I have an average-sized nose but wow, it is amazing what a little contour powder and an angled brush can do! 

Nevertheless, here I am this past Saturday morning before going out with friends. At this point, I had just showered with a shower cap on to keep my hair dry (I was going to do rolls). Moreover, I had not even had my coffee yet!

This is me, with no makeup on. Can we say, "eugh!?"

But with a good knowledge of makeup technique paired knowing which colors best suit me, I can transform into this:

So, what makeup follies have you endured? What have you girls learned along the way?

Thursday, February 9, 2012

FOTD Post! False Eyelashes for the Office? Yes, Why Not?

This is me, this morning before work. Makeup is done but I still have my dressing gown on! I gotta get dressed! Also, I want to apologize for the hair! It is in a claw clip because I have a hair appointment later today!

Without further ado, here is a breakdown of what cosmetics I am wearing:

On eyes:
Nars Pro-Prime Smudgeproof Eyeshadow Base
MAC Paint Pot in Rubenesque on lower lids
MAC Shadows in Motif, Copperplate, Vanilla, and Crystal Avalanche
Urban Decay 24/7 Waterproof Liquid Eyeliner in Perversion (a solid black)
Ardell False Eyelashes ("Wispies)
Duo Adhesive (for applying lashes)
MAC Opulash Mascara in "Bad, Bad Black"
Make Up For Ever Aqua Eyes Liner in 23L (on lower lash line)

On Brows:
My brows were tinted and waxed a couple of days ago but I am also wearing Anatasia Beverly Hills Brow Pen in "Universal Deep Shade" to give them a little extra definition.

On Skin:
Giorgio Armani Luminuous Silk Foundation in Shade 02
Make Up For Ever Full Cover Concealer in Shade 4
MAC Contour Powder in Bone Beige
MAC Mineralize Blush in Dainty
Giorgio Armani Lumious Silk Powder (to set everything)
MAC Mineralize Skinfinish in Porcelain Pink (applied on top of nose, cheeks, cupid's bow, and in center of forehead-to highlight)

On Lips:
Trish McEvoy "Flawless Lip"Primer
MAC Russian Red Lipstick
MAC Lip Pencil in Brick

On any given work day, I normally do not wear false eyelashes but this morning I felt inspired to wear them! I guess I was channeling my "inner diva!"  Here is how they look in the package:
And here is how they look upclose whilst on:
False eyelashes are amazing for nights out, photo shoots, special events, VLV and just because! They give eyes that "something extra" that our natural lashes may lack. My natural lashes are very fine and wispy but when I put falsies on, my lashes look full and lush!

Applying false eyelashes can seem like a daunting task at first but with some practice, they will become a snap! If you have no idea how to apply lashes, there are some amazing tutorials on YouTube. MAC Cosmetics used to have a great video tutorial on their site but it's no longer there.

I will do a lash tutorial for you all soon! I just need my husband's help taking pictures!

So, what makeup are you gals wearing today? And, how often do you wear false lashes?

Friday, November 18, 2011

My Daily Makeup Essentials! (Pic Heavy)

I would like to share with you all my daily, essential beauty products/items. In the 20+ years I have been wearing makeup, I have experienced the good, the "meh," and the downright bad.  Whether it was discovering Besame lipstick or finding out that Chanel foundations tend to be too yellow for my complexion, I have finally tailored my daily routine down to a select, 'tried-and-true' items.

For foundation, I cannot say enough about Giorgio Armani Luminous Silk Foundation ($59.00 USD)!

I know it's expensive but if you are going to splurge on anything beauty, it should be on a good-quality foundation! Foundation provides the backdrop, the canvas if you will, for your overall look. This formula is light and is buildable. The lightweight fluid simply melts into skin and imparts a natural finish with a soft, dewy glow. I was previously using Guerlain's Parure Gold but I realized it was a bit too golden (yellow-based) for my pale, cool skin.

For eyeshadow application, I refuse to put on shadow without a good primer. I have used Urban Decay and Too Faced. Both are wonderful. But, Nars Smudge-Proof Eyeshadow Base ($24.00 USD) outpaces them.
I love how this primer makes my shadow last for hours and hours without creasing but I hate the doe-foot applicator/packaging. It tends to waste product.  I prefer a squeeze tube like Too Faced Shadow Insurance. When my tube seems to be running low, I shake it and I get more product. If Nars would make this primer in a tube form, I would be ecstatic.

Speaking of eyeshadow, nothing beats MAC eyeshadow!

You can buy individual shadows in a flip top pan for $15.00 USD or single palette pans (for inserting into palettes) for $11.50 USD.

When it comes to maintaining my brow shape, I get them tinted and waxed professionally at my local salon every 5-6 weeks. To keep my brows looking up-to-date between appointments, I use MAC's Penultimate Brow Marker ($17.50 USD).

It is like a sharpie for brows! This marker comes in one color, a medium-toned, neutral brown. The super-fine tip can draw fine, whispy lines to more intense lines for precise outlining and filling in. The color can also be layered without heavy build-up or creating a "Mommie Dearest" look.

To ensure my brows' shape during the day, nothing beats Maybelline Great Lash Mascara in Clear ($4.24 at my local Target)!

The lightweight, clear gel formula keeps brows in place without making them feel "tacked down" or coated. The gel quickly dries down to a feather-light feel while helping brows look perfectly groomed.

For lashes, I swear by MAC Opulash Mascara ($15.00 USD). It only comes in black. Until Cover Girl cruelly discontinued their coveted Marathon Mascara a few years back, I had been searching high and low for a good dupe. I tried everything from Revlon to Yves Saint Laurent and nothing came close to the long-lasting, waterproof magic that was Marathon. Even though Opulash is not waterproof, it holds up well all day without smudging, flaking, or causing raccoon eyes. However, if I get my lashes wet (e.g. laughing so hard I cry, crying at the end of "Strictly Ballroom," putting in contact solution, tearing due to allergies, and/or skiing without goggles), this formula will flake off. Now, it will not come off in a grey, watery mess, it simply "balls up" and crumbles off. Nevertheless, Opulash imparts black, lush lashes that look defined and classic.

For creating a 50s/60s cat wing eyeliner look, I adore Urban Decay's 24-7 Waterproof Liquid eyeliner in Perversion (a solid black) that retails for $18.00 USD.
This liner comes in a total of 11 different shades ranging from solid black to glittery silver to bright jewel green, pink, blue, and gold. The super fine brush expertly draws the thinnest lines as well as thick, bold strokes. I have worn this liner all day at work and even all night at VLV and it does NOT move. I sometimes notice *slight* fading at the inner corners of my upper lash line but nothing glaring or obvious. However, when I used Chanel Automatic liner or MAC Fluidline, I was left with raccoon eyes and upper lid transfer. Other than a little tiny tendency to fade in the inner corners after several hours of wear, Urban Decay Perversion is the best.

For concealing dark undereye circles, blemishes, scars, and discolourations, nothing is better than Make Up For Ever Full Cover Concealer.
Now, despite it's slightly hefty price tag of $30.00 USD (for .5 ounce), this concealer packs a serious punch! The formula is very concentrated and a little bit really goes a long way! For example, when I do my daily look, all I need is a little dot and a MAC 195 brush. That little amount totally covers everything from undereyes, rosacea, acne, to pimple scars! The formula touts itself as "waterproof" but I have not tested that claim yet. However, this concealer does not migrate, cake, slide off, or settle into lines.

For helping my lipstick stay in place all day, I rely on Trish McEvoy Flawless Lip primer ($26.00 USD).
This slant-tip primer goes on like an emollient balm and it dries down to a grippy, matte finish. To use, simply swipe on the primer and let it set for about a minute. If you immediately apply lipstick, the balm will make your lipstick whiteish and slidey! Not a good look! The trick is to wait for the formula to dry down and then apply lipstick! The primer will help lipstick last longer, prevent feathering, and assist in intensifying color.

For gorgeous vintage, pin up lips, nothing surpasses Besame Classic Color Lipstick ($22.00 USD)! My favorite shade is Besame Red!
Besame Red is cool, bright red that stays true all day! The semi-matte forumla feels creamy without being too emollient and is long-lasting without drying out lips. The color fades evenly and it will not turn pink (as some red formulas tend to do) The level of pigment is high and the result is totally opaque, intense color!

When it comes to lining lips and/or preparing them for red lipstick, Bobbi Brown Lip Pencil ($20.00 USD) is red is a must-have for red lipstick gals!
Bobbi Brown's "Red" is a true, neutral bright red that can be worn with many shades of red (e.g.  Besame's "Besame Red," MAC "Russian Red," Julie Hewett's "Femme Noir," MAC Mattene in "Eden Rouge," Bobbi Brown's "Red" lipstick, Revlon's "Love That Red," and Julie Hewett's "Rouge Noir"). The pencil formula is creamy but the pigment stays in place without feathering or creeping. Moreover, the pencil ensures a crisp, precise line that is a must when doing a strong lip!

Now, the absolute "must-have" for any face is a good set of makeup brushes! Whether you prefer Ecotools, MAC, Japonesque, Smashbox, etc, brushes for face, eye, and lip are vital for proper application! I prefer MAC brushes.
When I was a teen, just starting out with makeup, I used the little sponge applicators that came with eyeshadow and I applied foundation with my fingers. I had no clue what I was doing and when I look back on high school photos, it shows! Nevertheless, I cannot see myself being able to do my face without a good set of brushes. Brushes, whether they are for smoothing on liquid foundation, applying shadow on lids, perfecting brows, polishing cheeks with blush, or setting your look with loose powder, can make all the difference between makeup and "wow factor" makeup!

To conclude, the one item I rely on to keep my makeup fresh all day is a set of oil blotting sheets. I like the ones from Clean and Clear ($4.49 USD for 50 sheets). I periodically use a sheet a couple of times throughout the day to absorb surface oil. If needed, I will then apply a light dusting of MAC Blot Powder Compact in Light ($23.00 USD) to keep shininess at bay.

So, what are your go-to beauty essentials?

Tuesday, October 18, 2011

Besame Lipstick Review: Classic Color Collection In Cherry Red

After updating my makeup kit last week, I realized that I was lacking a deep, cherry-toned red lipstick. Sure, I have several red lipsticks ranging from bright pink-toned shades, vibrant tomato-infused hues to neutral tones. But I needed a rich, sultry cherry shade to make my collection complete! Besides, a darker red is just perfect for fall!

In the last couple of years, I have come to the conclusion that most, mainstream makeup brands (e.g. MAC, Revlon, Make Up For Ever, Chanel, Nars, etc) fall a bit short (some more than others) when it comes to retro red lipstick colors. Moreover, their textures tend to be too dry or too emollient, they fade quickly when worn, tend to bleed, and/or the pigmentation is not quite "right."

Now, please do not get me wrong, I ADORE MAC's "Russian Red" and Make Up For Ever's Rouge Artist Intense Lipstick in Satin #42 but I prefer a semi-matte finish paired with bright, intense pigment. With that said, I have discovered 'vintage red lipstick heaven' with Julie Hewett and Besame Cosmetics' lipsticks. Not only are their colors AMAZING, their comfortable semi-matte texture is unbeatable when it comes to comfort and longevity! Even their vintage-inspired gold lipstick packaging is to die for!

I have been contemplating buying Besame's Classic Color Lipstick in Cherry Red ($22.00 USD) for a while and last week, I finally did! My package arrived yesterday and I have been wearing my new lippie ever since! Cherry Red is the forth Besame Classic Color Lipstick I now own. I have Besame Red, Red Velvet, and Carmine.

http://www.besamecosmetics.com/products.cfm/Classic-Color-Lipstick/pID-15

Cherry Red is a deep, rich red with a deep cherry base. The color is really like a fresh plucked cherry.  Now, the first photo shows the lipstick in bullet form. I think my flash brightened the color because the actual color in person looks very similar to MAC's Dubonnet (a deep wine red). However, once the lipstick is applied, the color seems to come alive and looks lit from within! Here is a swatch on the back of my right hand:
Here is me wearing Cherry Red. The color pairs PERFECTLY with MACs lip pencil in Cherry:
I cannot say enough how much I love Besame lipstick! It is my favorite, hands-down! It lasts a long time on my lips (accept for drinking and eating) and the color fades evenly.

So, if you are in the hunt for the perfect 40s/50s red lipstick, give Besame Classic Color Lipsticks a try!

Monday, September 19, 2011

It's Giveaway Time! Over 250 Followers!!

Edit: There is still time to enter the giveaway! If you have not done so already, just follow my blog and/or leave a comment by 11:59 pm EST (United States)!

It's giveaway time again, gals! In honor of having over 250 followers (270 to be exact! Thank you all so much!!) I would like to celebrate with a giveaway! I love doing giveaways! They are so much fun!

Nevertheless, this giveaway will feature a handmade, lacquered tin/container, a handmade, white flower hair clip, and an unused, brand-new-in-the-box, MAC Cosmetics Retro Matte Lipstick in Ruby Woo!
The lipstick is a gorgeous, vivid, matte blue-red shade that screams vintage! It makes teeth look so white and the color is the epitome of 40s/50s glamour! The hair flower is wonderful for evenings out, summer nights, and rockabilly events! All you need is a party dress and your dancing shoes! The lacquered tin is made from an Altoids Mints tin that has been cleansed and sterilised. I adorned the outside top with a 50s Jantzen ad along with some vintage lettering.  The tin is perfect for securing bobby pins (kirby grips), ponytail holders, jewelry, and/or travel necessities.

The giveaway starts Tuesday, the 20th of September and ends on Sunday, the 25th. The winner will be drawn and announced on Monday, the 26th.

To enter, just follow my blog (if you don't already) and add a comment to this entry.

Good luck to all and have fun!

Wednesday, July 13, 2011

Summer Makeup Must-Haves!

Now that summer is here, I though I would share with you all some great products that will help ensure your makeup's staying power and also help protect your skin from the sun!

In the heat of summer, our makeup can fall victim to heat, perspiration, humidity, and the sun. Oil production increases, foundation slides off, blush fades away, and days spent outside can cause sunburn that can lead to sun damage, premature aging, and even skin cancer.

So, what is a summertime gal to do? She can update her beauty kit with products that will safeguard her look and skin!

One of the most important items a gal should have in her summertime kit is a moisturizer, foundation primer, or foundation that contains SPF. If I am going to be outside for long stretches of time, I rely on RoC Complete Lift Daily Moisturizer in Spf 30 (retails for about $20-25+ USD). I also wear it when I go skiing in Colorado. It provides complete sunblock protection and it goes well under mineral foundation and powder foundation. For some reason, this moisturizer does not pair well with liquid foundation. I am not sure why but it tends to "ball up."

When shopping for a foundation that has sun protection, anything with a SPF of 15+ is ideal. The same goes for a daily moisturizer or foundation primer.  If you are unsure about what SPF to purchase, please visit the Skin Cancer Foundation site:

http://www.skincancer.org/seal/

If you want a foundation and moisturizer with SPF together, then I cannot recommend Laura Mercier's Tinted Moisturizer (1.7 ounce for $42.00 USD) in SPF 20 enough! There are three different formulas in this range: the original, oil-free, and Illuminating (has a pearly highlight effect). I prefer the Oil-Free because my skin is very oily! The shade that I use is the lightest, Porcelain.

This foundation provides sheer to light coverage. It is perfect on lazy weekend days or when you want a no-fuss look. On the days I am doing yardwork or hanging out by my in-laws' pool, I simply wash my face, put on a pea-size amount of foundation, set with loose powder, apply red lipstick, put on a hair scarf and sunglasses, and I am done.

In the last year, I have started using foundation primer occasionally for special events like nights out and Viva Las Vegas.  I first used MAC's Prep and Prime SPF 50 Primer but it contains a lot of silicone which broke me out badly. I was very disappointed because it really made my foundation look better and last so much longer.  However, before I went to my first Viva back in April, Erin from Every Branch Blog recommended Korres 99% Oil-Free (basically means little to no silicones) Natural Foundation Primer for $28.00 USD (available at Sephora stores and Sephora online). This primer is very light and it helps provide a smooth base that makes foundation look more even and last longer. When I was at Viva, this primer did wonders in helping my makeup survive nighttime dancing and cocktails, the pool party, and the car show.

Another important item for summertime makeup is blot powder. I use MAC's Blot Powder in Light ($23.00 USD). This powder is not heavy and it does not coat the face in heaviness. It is very light and very finely milled. It simply blots oil and mattifies skin.

Speaking of blotting oil, I cannot tell you how grateful I am to have discovered oil-absorbing sheets! I use the Target "Up and Up" brand and I cannot remember how much they cost but I suspect they are around 3 bucks. The sheets by Clean and Clear (50 count) are $4.49 USD.

These sheets are also available at MAC but the Target and Clean and Clear brands are identical to MAC's and they are cheaper! Throughout the day (e.g. every couple of hours), I will use one sheet to blot excess oil and then I will re-apply my MAC Blot Powder. This method will help prevent powder build up and a cakey look that can sometimes result from layering powder on top of oil over and over.

When I was in high school and college, I worked at an amusement park. I spent most of my days working outside in the Virginia heat and humidity. I would often pull out my Cover Girl Clean and Natural compact to blot my face and by the end of the day, I looked like a coated, pale pancake from hell! When I started using blot sheets about 8-10 years ago, I soon discovered that not only did my makeup look better at the end of the day, I had less breakouts as well.

In conclusion, summertime makeup essentials should include a good SPF, an oil-free/light coverage foundation or tinted moisturizer, an oil-free foundation primer, an oil-blotting powder, and an oil-absorbing sheets. With these must-haves in your kit, you are sure to look picture-perfect all summer long!

Today's Makeup and New Shoes (cheap!)

Hey all! I hope everyone is well on this Wednesday! It has been so hot here in the DC area! This afternoon while I was at work, we had a major thunderstorm go through. The lightning was glorious! Ask anyone and they will tell you that I *love* thunderstorms! There is just something so powerful and beautiful when Nature puts on a good 'light show!'

The pic above shows me this morning before I left for work.  As I was taking the picture on my Blackberry, the cat was yelling at me (very loudly), demanding my full attention. She gets extra needy whenever her 'daddy' is away on business. Let me tell you, getting her to go bed last night was practically impossible! Brat!

Nevertheless, I would like to share with you today's makeup!

MAC Paint Pot in Rollickin' (a pearly, seafoam, green-blue cream shadow base) was applied to the lower lids.

MAC Aquadisiac eyeshadow (a shimmery teal) was applied on top of Rollickin' Paint Pot.

MAC Surreal Shadow (a shimmery green-based light blue) was blended onto the crease.

MAC Crystal Avalanche (a bright white pearl) was applied to the browbone.

MAC Liquidlast Liner in Point Black was applied in a cat-wing shape using a MAC 208 brush.

Urban Decay 24/7 Glide-on Eyepencil in Electric was applied to the lower lash line and then was set with MAC eyeshadow in Aquadisiac (using MAC 212 brush).

Maybelline Volum'Express One by One Mascara in Black (Waterproof) was applied to top and bottom lashes.

MAC Eyepencil in Fascinating (a stark white) was applied to my waterline. 

On my face, I am wearing Guerlain's Parure Gold Foundation in Beige Claire 01, MAC blush in Pink Swoon, and Murad's Acne Treatment Concealer in Light (to cover a few breakouts). I set my face makeup with Coty Airspun Loose Powder in Translucent and finished the look with Make Up For Ever's Rouge Artist Intense lipstick in #45 and MAC Lipliner in Cherry.

Today, I am also wearing a new pair of Miss Me? black velvet-esque fabric (almost a faux suede-like material) platform shoes. I bought these on Endless.com (a division of Amazon) for $40.00USD! They also come in purple!
That 'thing' on the far right is my cat's plush catnip mouse toy. She wanted me to play fetch.
These shoes are very comfortable but they do run a 1/2 size+ too large. I am normally a 7 but I ordered the 6.5 (based on the online reviews stating the shoes run big) and they are still a little too roomy for me. I put a pair of Foot Petal inserts in the ball of each shoe and I can feel my heel sliding forward a tiny bit. I can make the shoe tighter by buckling the last hole in the ankle strap. I can also buy some heel inserts or the Foot Petal Killer Kushionz:
 Moreover, one curious and potentially comical (and dangerous for the clumsy like myself) feature of this shoe is that it has velvet soles.
 When I tried them on in my bedroom, I walked for a second and I felt like I was traversing on a "Slip n' Slide!" I pictured myself 'sliding' to my death on my carpeted stairs! Imagine the husband, coming home and finding me at the end of the staircase having been eaten by the cat. At least I died in style..... (JK!)

Interestingly enough, when I walk on concrete surfaces or asphalt, these shoes have great traction. They are a bit tricky on carpet and wood flooring. I suspect the velvet soles will get rougher and therefore easier to control after a few wears.

Overall, I know I will be wearing these shoes a lot! They have a great 40s style that will pair well with many things like dresses, skirts, and even wide leg, high-waist trousers.

I hope everyone is having a good 'hump day!'

Wednesday, March 30, 2011

Basic Nude Eye Look for Daytime

In honor of the fast-approaching Viva Las Vegas 14, I would like to present a nude eye tutorial. The first three eye tutorials were bright, intensely-hued, glittery looks appropriate for evening. This one, however, is a simple look that would be great for day.  In the 40s and 50s, day makeup was basic. The eyes were left understated and the focus was on defined brows, black glossy lashes, rougey cheeks, and a strong red lip. However, in the evening, ladies often wore shades of blue, green, gray, or lavender on eyes.

Moreover, if you want to keep this look 'low-key' but want to 'kick it up a notch,' you can add a black cat wing eyeliner on the top lashline.

Here is me before makeup this morning. Eugh! I need to get some makeup on my face quickly!
To start, I applied Nars Pro-Prime Smudge-Proof Eyeshadow Base on my entire eyelid to brow bone and on my lower lid, I applied my own blend of MAC Paint Pots in Soft Ochre and Painterly:
 Then, I applied MAC shadow in Orb (a pale matte vanilla custard) using a MAC 213 brush. On my crease, I applied MAC's Omega shadow (a soft, matte cork brown) using a MAC 230 brush. I then applied MAC Vanilla shadow (a satiny pale vanilla ice cream shade with hint of shimmer) on my brow bone using a 217 brush. To finish, I curled my lashes with my She Uemura curler and coated lashes with MAC Opulash in Bad, Bad, Black.
Orb is the second shadow in the top row. Omega is the last shadow in the second row and Vanilla is the first shadow in the first row.
From left to right: MAC 213, MAC 230, and MAC 217.
Here is an upclose view. Sorry for the odd 'tawniness' under my eyes. My camera phone was casting a shadow.

My next and final tutorial will feature a silver and silver glitter look. Tomorrow will mark exactly three weeks until Viva! Hope to see you all soon!

Monday, March 28, 2011

Pink and Purple Eye Look with Opal Pink Glitter!


In continuance of my Viva Las Vegas evening/dance eye makeup series, today I present to you a third shadow look using purple, pink, and white opal pink microglitter. On my lips, I am again wearing Make Up For Ever's Rouge Artist Intense Satin Lipstick in #45 (a blue-based, cool-toned, cherry red).

Here are the brushes/tools I used:
From left to right: MAC 213, MAC 242, MAC 230, MAC 217, MAC 214, MAC 227, MAC 223, and my Shu Uemura eyelash curler.

 The above picture shows some of the products used. From top to bottom: Nars Pro-Prime Smudge-Proof Eyeshadow Base, Chanel Automatic Liquid Eyeliner in Black, MAC Opulash Mascara in Bad, Bad, Black, MAC Pro Chromagraphic Pencil in Rich Purple, MAC Paint Pot in Bare Study, MAC Pro Eyeliner Mixing Medium, and Trish McEvoy Shadow Transformer Liquid.

Here are the shadows:
From left to right: MAC Pro shadow in India Ink, MAC Crystal, MAC Pink Freeze, and MAC Crystal Avalanche.

I also used MAC's Stars n' Rockets:
 And MAC's shadow in Yogurt:
And here is MAC Pro's Reflects Transparent Pink:
 Here is a swatch detailing the Chromagraphic Pencil's color:
To start, I applied the Nars Eyeshadow primer on my entire eyelid, ie from lashes to brow bone. I dampened my MAC 213 brush with Trish McEvoy's Shadow Transformer and then dipped the brush onto Stars n Rockets shadow. I applied the shadow on my lower eyelids. The shadow transformer makes sheer shadows more intense. If you do not have a shadow transformer liquid, Visine works wonders too!

Using a MAC 230 brush, I applied MAC's India Ink (a deep, matte cool-toned purple) onto my crease and then applied a light wash of MAC shadow in Crystal on top with a MAC 217 brush. To make the crease shadow look extra smooth, I blended it with a MAC 227 brush.

On my brow bone, I applied a blend of MAC shadows in Crystal Avalanche and Yogurt. I did a thinner version of cat eye liner using the Chanel liquid liner. I did not want to create a thicker line because I wanted to properly showcase the glitter.

In order to properly adhere the glitter to my lower lids, I mixed a tiny dot of MAC Pro Eyeliner Mixing Medium (a clear gel) with the MAC Pro glitter on the back of my hand and I put it on my lower lids using a MAC 242 brush. On my lower lids, I applied the Chromagraphic pencil in Rich Purple. To set the liner and make it look less stark, I applied a light amount of Stars n Rockets using a MAC 214 brush.  On the corners of my inner eyes, I applied a touch of MAC Pink Freeze shadow (a frosty light pink) as a highlight. To finish, I curled lashes using my curler and then coated both sets of lashes with MAC Opulash Mascara.

Here is a detail view:
And another:
Interesting note, MAC's Stars n Rockets shadow looks pink in the shadow pan but in certain flashes of light and when photographed, the shadow looks lilac or lavender in tone.

I took another picture under the natural light in my kitchen and the pink tones are more evident:

I have been enjoying the creation of this eye looks and I have really been enjoying your feedback and comments! I hope you all like this latest one!

My next look is going to be a silver look with silver glitter! Viva is almost three weeks away and I am starting to get really jazzed!